
Motivation
I’ve never written an interpreter before but find the idea quite interesting. I also happen to like games and have close to no experience in C - so when looking at the best way to cross off those items from my bucket list, writing a CHIP8 interpreter in C felt like the best way to move this forward.
Caveat emptor: this is new stuff to me. I’m going to enjoy the journey so if your objective is to knock this off in an afternoon, there are much better resources out there. Also, subsequent posts may backtrack and try new things. Improvise, Adapt, Overcome.
If you do plan to follow along, the project set up will follow my previous post. This is as hassle-free as I could make it.
Graphics
So unlike say, JavaScript where we have a fancy Canvas to draw on, with C we sort of need to start from scratch. Thankfully there are a number of libraries that offer this functionality.
graphics.h
This is a library that seems to be quite popular with the likes of DOS emulators and old(er?) games. The trouble I had was that it’s non-standard and I couldn’t find a package for it - which meant downloading from source, managing dependencies etc… As my previous post might have hinted, I’m a big fan of automation and low barrier to entry. So despite what felt like a simple API, I started looking for an alternative.
SDL2
The Simple Directmedia Layer is a cross-platform library that allows you to well, interface with a whole host of stuff - from peripherals (keyboard, mouse), graphics (backed by OpenGL mainly) and even sound (CHIP8 defines a buzzer). Best of all, it’s a simple apt install libsdl2-dev away on my platform.
The API is more involved but it’s extensively used, well documented and you’ll be able to find tons of examples and tutorials. Sold.
Getting set up
This part is specific to running this via WSL2. If you’re doing this natively on Linux/MacOS it should be relatively simpler.
Also note the settings shared are meant to get things up and running quickly - once that’s done, feel free to tweak as you see fit (e.g. restricting access to the XServer).
Windows dependencies
ADDENDUM (20211210): it turns out you can happily use the new WSL2 GUI version that does this out of the box - see part 2 for details
I’m doing this via WSL2, which means that I need an XServer on the Windows host. There are a few to choose from but one that I quite like and available via Chocolatey (a package manager for Windows) is vcxsrv. Installing just means choco install vcxsrv.
When starting the XServer I find it easier to have the following settings:
- Multiple windows
- Display number of -1
- Start no client
- Native OpenGL
- Disable access control
Linux dependencies
You’ll want to run sudo apt install libsdl2-dev. Once installed, you can validate via something like:
❯ find /usr -name SDL2
/usr/include/SDL2
/usr/include/x86_64-linux-gnu/SDL2
/usr/lib/x86_64-linux-gnu/cmake/SDL2
❯ head /usr/include/SDL2/SDL.h -n 4
/*
  Simple DirectMedia Layer
  Copyright (C) 1997-2019 Sam Lantinga <slouken@libsdl.org>
When running this in WSL2, you’ll need export 2 variables in the shell you’ll be running this from:
❯ export DISPLAY=$(cat /etc/resolv.conf | grep nameserver | awk '{print $2}'):0.0
❯ export LIBGL_ALWAYS_INDIRECT=1
The former is to specify where the XServer is located and the latter is because we enabled OpenGL on the host.
Displaying “stuff”
The CHIP8 spec defines the screen as having a 48x64 pixels resolution (48 rows x 64 columns). That’s crazy small on today’s FHD/4K screens. We’ll handle scaling in a later post but we’re mentioning there for reference. Also, it’s monochrome! That means a pixel will either be on (with a colour of our choice) or off. No in-between.
Testing the installation
First things first though - let’s work on a minimal example to confirm everything has been set up properly.
Hooking this up with Conan/CMake
SDL2 was installed via our distro’s package manager so there isn’t much we need to do. My conanfile.txt only contains the below:
[generators]
cmake
❯ mkdir chip8_p1
❯ cd chip8_p1
❯ ls
❯ mkdir -p {src,build}
❯ cat > conanfile.txt
[generators]
cmake
❯ cd build
❯ conan install ..
Configuration:
[settings]
arch=x86_64
arch_build=x86_64
build_type=Release
compiler=gcc
compiler.libcxx=libstdc++
compiler.version=9
os=Linux
os_build=Linux
[options]
[build_requires]
[env]

conanfile.txt: Installing package
Requirements
Packages

Installing (downloading, building) binaries...
conanfile.txt: Generator txt created conanbuildinfo.txt
conanfile.txt: Generator cmake created conanbuildinfo.cmake
conanfile.txt: Generated conaninfo.txt
conanfile.txt: Generated graphinfo
And this is my CMakeLists.txt (at the root of the project directory):
cmake_minimum_required(VERSION 3.5)
project(throwaway)

add_definitions("-std=c11")

include(${CMAKE_BINARY_DIR}/conanbuildinfo.cmake)
conan_basic_setup()

add_executable(main src/main.c)
target_link_libraries(main ${CONAN_LIBS} SDL2)
Note how the last line tells Conan to link our main with SDL2.
Your project should now look like this:
❯ tree chip8_p1
chip8_p1
├── build
│   ├── conan.lock
│   ├── conanbuildinfo.cmake
│   ├── conanbuildinfo.txt
│   ├── conaninfo.txt
│   └── graph_info.json
├── conanfile.txt
└── src
An MVP
Now we need to write some code! Copy-paste the below in src/main.c:
#include <stdio.h>
#include <SDL2/SDL.h>
#include <stdbool.h>

// not the actual chip8 dimensions!
#define SCREEN_WIDTH 640
#define SCREEN_HEIGHT 480
// blue
// the pixel format as defined when we create the texture is RGB + Alpha - so 8bits x 4=32 bits
#define PIXEL_ON 0x0000ffff

int main(int argc, char *argv[])
{
    bool quit = false;

    SDL_Init(SDL_INIT_EVERYTHING);

    SDL_Window *window = SDL_CreateWindow("CHIP8 Display",
                                          SDL_WINDOWPOS_UNDEFINED, SDL_WINDOWPOS_UNDEFINED, SCREEN_WIDTH, SCREEN_HEIGHT, 0);
    SDL_Renderer *renderer = SDL_CreateRenderer(window, -1, SDL_RENDERER_SOFTWARE);
    SDL_Texture *texture = SDL_CreateTexture(renderer, SDL_PIXELFORMAT_RGBA8888, SDL_TEXTUREACCESS_STATIC, SCREEN_WIDTH, SCREEN_HEIGHT);

    // we store each pixel on our screen in an array
    uint32_t pixels[SCREEN_WIDTH * SCREEN_HEIGHT];
    for (int i = 0; i < SCREEN_WIDTH * SCREEN_HEIGHT; i++)
    {
        pixels[i] = PIXEL_ON;
    }

    SDL_UpdateTexture(texture, NULL, pixels, SCREEN_HEIGHT * sizeof(uint32_t));
    SDL_RenderClear(renderer);
    SDL_RenderCopy(renderer, texture, NULL, NULL);
    SDL_RenderPresent(renderer);

    // main loop!
    while (!quit)
    {
        SDL_Event event;
        SDL_WaitEvent(&event);

        switch (event.type)
        {
        case SDL_QUIT:
            quit = true;
            break;
        default:
            break;
        }

    }

    SDL_Quit();

    return 0;
}
To compile, we’ll need a Makefile. This is where cmake comes into the picture - go to the build/ directory and
❯ cmake ..
-- The C compiler identification is GNU 9.3.0
-- The CXX compiler identification is GNU 9.3.0
-- Check for working C compiler: /usr/bin/cc
-- Check for working C compiler: /usr/bin/cc -- works
-- Detecting C compiler ABI info
-- Detecting C compiler ABI info - done
-- Detecting C compile features
-- Detecting C compile features - done
-- Check for working CXX compiler: /usr/bin/c++
-- Check for working CXX compiler: /usr/bin/c++ -- works
-- Detecting CXX compiler ABI info
-- Detecting CXX compiler ABI info - done
-- Detecting CXX compile features
-- Detecting CXX compile features - done
-- Conan: Adjusting output directories
-- Conan: Using cmake global configuration
-- Conan: Adjusting default RPATHs Conan policies
-- Conan: Adjusting language standard
-- Current conanbuildinfo.cmake directory: /home/axiomiety/repos/chip8_p1/build
-- Conan: Compiler GCC>=5, checking major version 9
-- Conan: Checking correct version: 9
-- Configuring done
-- Generating done
-- Build files have been written to: /home/axiomiety/repos/chip8_p1/build
Once successful, you can actually issue the make command:
❯ make
Scanning dependencies of target main
[ 50%] Building C object CMakeFiles/main.dir/src/main.c.o
[100%] Linking C executable bin/main
[100%] Built target main
And, assuming you have exported the DISPLAY and LIBGL_ALWAYS_INDIRECT variables mentioned above, running ./build/main will present you with this beautiful, deep blue screen:
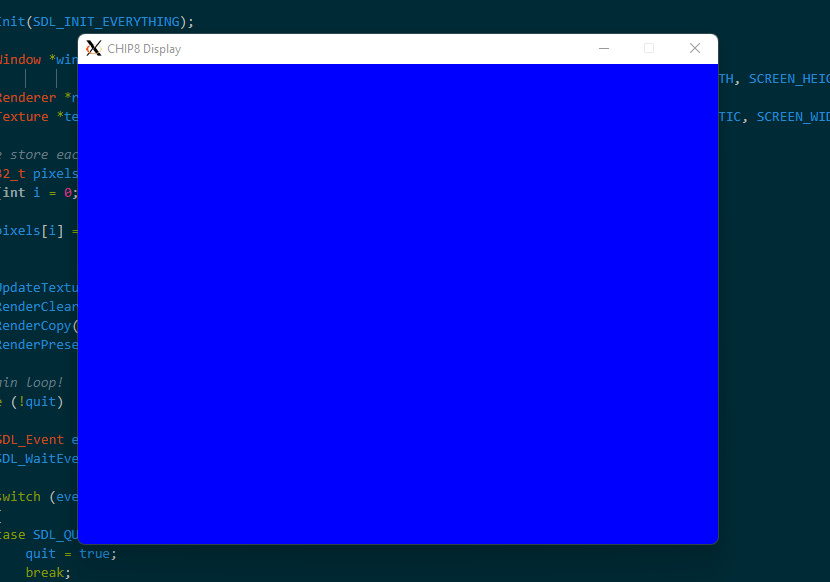
Success!
User Input
ADDENDUM (20211210): A different approach was taken in the end - see part 7 for details
So right now we can display “something”. But how do we take input? With CHIP8, that will primarily be the keyboard. We’ll fix the layout later but let’s update our MVP to:
- log when a key has been pressed
- exit when it has been released
As per the SDL_KeyboardEvent documentation (of which SDL_KEYUP and SDL_KEYDOWN are part of), we are looking for the keysym.sym field.
The switch statement now looks like this:
        switch (event.type)
        {
        case SDL_QUIT:
            quit = true;
            break;
        case SDL_KEYDOWN:
        {
            SDL_KeyboardEvent key_event = event.key;
            SDL_Log("Key down registered: %d", key_event.keysym.sym)
        }
            break;
        case SDL_KEYUP:
            quit = true;
            break;
        default:
            break;
        }
If you you keep the key pressed, you should then see something like INFO: Key down registered: 122 - achievement unlocked.
Conclusion
So we can now display to a “canvas” of sorts, and take keyboard input. In the next post we’ll cover sound!